Tuesday, August 4, 2015
Installing Windows 10 Technical Preview [VHD]

 With the release of Windows 10 Technical Preview, I think is a good shot to explain how to install an OS in a VHD (Virtual Hard Disk). Because this is a Preview, which means it's a beta version, installing this edition as Default and unique OS isn't a good choice at all. Crashes, may happen.
One option is install the Windows 10 TP in a virtual machine. In PC's with lack of memory and fast CPU .. you won't be able to enjoy the real Windows 10.
My suggestion, is to create a new partition and install it there, or even more easier and also secure, install it in a Virtual Hard Disk.
Download Windows 10 TP
Redirect to another post
What is a Virtual Hard Disk?
Virtual hard disk (VHD) is a disk image file format for storing the complete contents of a hard drive. The disk image, sometimes called a virtual machine, replicates an existing hard drive and includes all data and structural elements. It can be stored anywhere the physical host can access.
There are two main types of virtual hard disks: fixed-size and dynamically expanding. Both types have a maximum size value that specifies how large the disk will appear to virtual machines. However, fixed-size VHDs will automatically take up the specified amount of physical disk space on the host computer's file system, whereas dynamically expanding disks will allocate space only as needed.
Advantages of installing Windows in VHD
Significant benefits result from the ability to boot a physical computer from a virtual hard drive:
- Ease of deployment: IT organizations can deploy standardized, 'pre-built' configurations on a single VHD. As an example, software engineering organizations which need a specific set of tools for a particular project could simply 'pull' the appropriately-configured VHD from a network location.
- Backup-and-Restore: Changes to the contents of a VHD (such as infection by a virus, or accidental deletion of critical files) are easily undone.
- Multi-User Isolation: Many current operating systems support having multiple users, but offer varying degrees of protection between them (e.g., one user of the OS could become infected by a virus which infects other users, or make changes to the OS which affect other users). By giving each user their own version of the operating system—say, by creating for each of them a differencing VHD based on a base installation of the OS—changes to any particular child image would have no effect on any of the other child images.
Create and mount VHD
I will work just in CMD (Windows Command Prompt)
- Run CMD
On Windows 8.x, press Windows + S and search for cmd
For older OS you can search for it on Start Menu
 for cmd
 In addition, you can access Prompt by pressing Windows + R and type cmd, then OK
To work with VHD files, I'll use the diskpart tool.
DiskPart.exe is a text-mode command interpreter that enables you to manage objects (disks, partitions, or volumes) by using scripts or direct input from a command prompt. Before you can use DiskPart.exe commands on a disk, partition, or volume, you must first list and then select the object to give it focus. When an object has focus, any DiskPart.exe commands that you type act on that object. [source]
- Once on Prompt, type diskpart to initialize diskpart tool. (require administrator rights
)

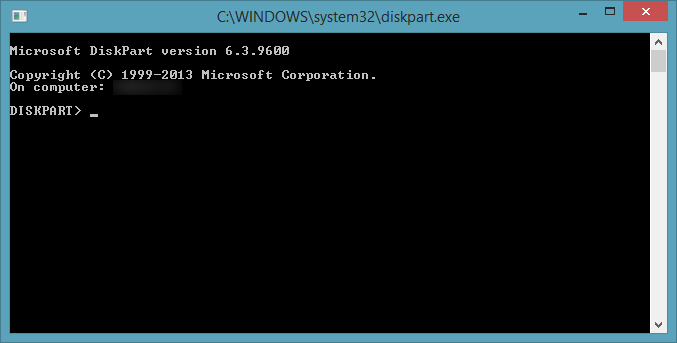 A new window will show up (see more). Now type the following script [change the specifications as you wish like path, size, type ...]
create vdisk file="D:\vdisk.vhd" maximum=40000 type=expandable
attach vdisk
create partition primary
assign letter=m
format
attach vdisk
create partition primary
assign letter=m
format
Remember this is just an example
In the first line, the syntax is based on:
create vdisk file=<file path> [maximum=<size in Megabytes>] |{[type=<fixed|expandable>]
You can also modify the fourth line. There, you tell diskpart which drive letter you want to assign to the volume. In this case, M:
Be careful with the letter you chose. You can get an exception because that letter is already in use. Go to Windows Explorer followed by Computer and take a look for the letters in use. You can't use any of them.

VHD was successfully created and formatted.
WAIK Tools (Windows Automated Installation Kit)
The Windows Automated Installation Kit (Windows AIK) is designed to help original equipment manufacturers (OEMs), system builders, and corporate IT professionals deploy Windows onto new hardware. The Windows AIK is a set of deployment tools supporting the latest release of Windows. This guide describes the methods, tools, and requirements for deploying Windows. [source]
Because we just need imagex, is ridiculous download an ISO file with 2Gb or more when imagex actually is a 598kb size file.
There is an app which allow you to download the main tools for Windows Vista/7/8.x including imagex.
Know more about imagex tool


- Copy the folder path of imagex.exe [example: C:\Folder_name]
- In pictures above, the path is a bit extensive and complex to use in command prompt. To avoid any problems, please, copy the imagex.exe to directory C: .(or C:\Sources for example, something simple). The following scripts in this tutorial will present the path C:\imagex.exe (images may not match, I will update them)
- Mount the download ISO file (Windows 10)
In Windows 7 and 8.x, exists an integrated tool in Windows which allow you to mount virtual images. Just right-click on Iso file and click Mount. If that option is not available, use thirdly-part software like UltraIso, Deamon Tools ...
- Run cmd as administrator
On Windows 8.x, press Windows + S and search for cmd. Right-click and press Run as Admin
Works the same way for older OS. On Start Menu, search for cmd and Run as Admin
, search for cmd and Run as Admin- Type the location imagex.exe
cd _folder path of imagex_
Example: cd C:\
Example2: cd C:\Folder
(ignore the considered path on image)

- Type
imagex /apply _ISO mounted path\sources\install.wim_ 1 _VHD assigned letter_
Example: imagex /apply f:\sources\install.wim 1 m:
The base structure is
imagex /apply image_file image_number image_name image_path
image_file : Specifies the name and the location of the volume image applied to the directory.
image_number : Specifies the number that references the specific volume within the .wim file.
image_path : Specifies the file path where the image will be applied.
Wait a few minutes for completation


Adding a VHD to native boot
- Run cmd as administrator
On Windows 8.x, press Windows + S and search for cmd. Right-click and press Run as Admin
Works the same way for older OS. On Start Menu, search for cmd and Run as Admin
, search for cmd and Run as Admin- Type
bcdboot _vhd assigned letter_\Windows
Example: bcdboot M:\Windows
Concluding
Now, restart your PC. Boot to Windows 10 Technical Preview and finish installation
[pictures and more support coming soon]
Windows 10 Technical Preview Product Key
NKJFK-GPHP7-G8C3J-P6JXR-HQRJR
Subscribe to:
Post Comments (Atom)
No comments:
Post a Comment